Showing posts with label blogging the oldies. Show all posts

Tuesday, July 5, 2011

DIY scrap wood dollhouse renovations


Scroll down for before and after pics!


Last Christmas ( yes, I know I have a story for everything) we decided to have a ‘homemade Christmas’.  We didn’t buy presents for the kids and wanted to try and 'use what we had' around the house and we made their gifts ourselves.  I have posted about the quilted pillows and the race car track but I just have not gotten around to the scrap wood dollhouse we made for our two little girls.  We had made the fun cardboard dollhouses (that are still around) and wanted to give their Polly’s their own permanent residence. 
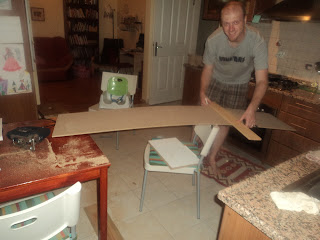
We wanted to ‘use what we had’ and truth is there is no DIY Stores here so we used the scrap wood we had from an old dresser.  As you will see constructing the DIY dollhouse in an apartment can be rather messy for my kitchen. J

The following is our collection of scrap wood.

And here is what we did with it....


We barely finished the dollhouse for Christmas morning in time and I had NO time to decorate it so we gave it as is:


However the girls were delighted and have played with it faithfully on and off over the year despite it’s lack of decor.


Well renovations have begun on our Scrap wood dollhouse and inspiration has been my friend.


Here are a few before and after pics. I have completed the kitchen and living room and am working on the loft/party room.
I hope you enjoy!
Here is the kitchen. My favorite piece is the little bottel caps with a piece of fabric in the middle. :)


I made my own little shelf with cardboard and hot glued it together and then hot glued it to the wall.  I would still like to paint the little tea table and dinning room table but I am not sure what color?? White, any thoughts?


The dinning room was alot of fun!  The wall paper is fabric pieces ~ I love the patchwork look and the girls think it is great.  I used the cornstarch mixture from this post to paste it to the wall.  I am sure I will do this again on one of the other rooms.
My girls favorite piece in the living room is the little tack hooks I made.  :)
(I made the littte ottomon on the left out of cardboard and fabric with some stuffing. The coffee table is made out of 3 ribbon spools. )

I have this thing about homemade dollhouses. They have a way of growing with your girl and everytime they get a new piece of furniture or a new teapot their love for their dollhouse starts all over again.  Also when the kids get to help, paint, decorate and create it gives them so much ownership to their wonderful creation that provides HOURS of fun and imagination and helps keep the little girl in my little girls. :) Plus doing it together keeps me close to them. :)

~Becky


Friday, February 25, 2011

How about a few Mrs. Robotos. :)

Blogging the oldies # 5
I have a few more of our older creative moments that I am still wanting to record on and off.  This one was a lot of fun and they were able to do a lot of it by their selves with a little help from Baba (daddy) and me. Plus it really taught the girls that you can use anything to create.

This was last summer A and L helped me to collect this and thats
 into a recycle box on the balcony.
After a week or so they were ready to create.

So out to the balcony we went one sunny summer Saturday..
and they made their own robots.


I can't remember their names now but they were defiantly girls robots!

If you are wondering what we did with them well if you look real hard you can see they joined us as center pieces on our bufe for about a week. 

Part of giving my kids the opportunity to create is to display their art..and so I am certain that that week last summer I had the most creative center pieces in my apartment! (it might have been over a week)


~becky


"Better to have little, with the fear of the Lord, than to have great treasure and inner turmoil."Prov. 15!:16

Tuesday, February 1, 2011

Homemade fairies

Transforming Polly Pockets ..into FAIRIES :)  And with the help of a blog called http://www.filthwizardry.com/ we made them their own little dwellings too. (by the way filth wizardry is my blogging/crafting hero, her projects are amazing) The dwellings are from fabric softener containers.  The fairies not only had their own homes but built in air fresheners, I couldn't get they fabric softener smell out for the life of me. :)

Blogging the oldies #4 :
These little wings are pretty simple just used cardboard or card stock and decorated them
 then we used pipe cleaners to attach wings to the arms.  

They lasted long enough to get some fun hours in and then the polly's
wings were taken and they went from being fairies to ordinary polly's again. :)


I may take a break from this series (blogging the oldies) for a bit and move on to some of the
 new things we have been up too. :)   All for now. ~ Off I go to miraculousness clean house and make dinner in a single bound. 

Wednesday, January 26, 2011

DIY cardboard dollhouse

Blogging the oldies #3 ~ Polly Pocket DIYcardboard dollhouse.

These boxes were from Ikea. (there is an Ikea in Istanbul!!) I think they had ceiling lights in them. I saved them for some time and then inspiration hit.  I painted and prepared the doll houses with some wall paint we had from the past and then gave them to the girls and we worked on decorating the outside and the inside together.

We made these houses and furniture in April of 2009 and they have lasted for over a good year and a half and my girls have played with them ALOT.  For Christmas this year we made a wood doll house from scrap wood ~ a more permanent home for their Polly pockets. ;)

Here are the beds. I let the girls pick out the fabric they liked and I sewed it around the sponge to make a cozy bed and then cut out a piece that matched for the blanket.  I wish I would have taken more pics of the furniture pieces. 
                      Here is a video of the finished product and a little tour of the Polly pocket homes.

The furniture is simple - tea boxes, egg carton for lights, match boxes, cut out pictures from magazines etc. The kitchen floor is scrapbook paper cut in squares and then glued in.

I have a few more 'blogging the oldies' about Polly pockets that I want to post.  I really like Polly pockets.  They are small and easy to store, innocent and they are affordable here and they last.  My desire is to keep the 'little' in my little girls and some of the toys out there go against that goal, however I think Pollies work for us.

I looked up different sites online when I was making our doll-houses and so I hope this gives someone else some fun inspiration.~

Ok enough about that~

Sunday, January 23, 2011

DIY building blocks for Isaac

Blogging the oldies #2  
These are milk and juice cartons.  We have that 'long life' milk and it all comes in the same size containers soo... we saved up a few and Alyssa my dear friend saved up a few for me and tada we could begin.


I cut out the spout and then rinsed each one, let them dry and then stuffed them not too tight with newspaper and then contact papered them.  I think if I could have found a brick kind of contact paper that would have been fun but I found what I found and am happy that contact paper is so inexpensive. 


This pic makes me happy.  It is such a reward for me to see my kids use what I created.

We made these about a year ago and they are still in good condition and in Isaac's room, which he plays with from time to time.


This picture was taken this week. I caught the kids in action with the building blocks. 
Nothing too exciting but one of those projects that are simple and it was one of the beginning projects here in my little west corner that I started using what I had. ~

Thursday, January 20, 2011

DIY cardboard playhouse (shanty)


Blogging the oldies ~

 I am going to dedicate the next series of posts to some old creative moments we have had here in this little ole town.  Mainly lots of pics and lots of fun stuff the kids and I have done together.
First and a favorite of ours:


THE CARDBOARD SHANTY (diy cardboard playhouse)

Yes, just like in my post :  Cooking it up in make believe - (again I found these boxes next to a  Garbage bin down the street with all three kids, and we hauled them home. :) 


Box #1


Box #2


Here is the shanty ready to be inhabitited


Oh look tenants have arrived.

Looks like they have made themselves a home


Yes, these tenants spent much of there time discussing matters of great importance,
and eating crackers.


The shelf was added simply by using pipe cleaners. I poked holes through the box and then the shanty and had one of the kids hold the 'shelf'  while I poked it through from the shanty to the box and then twisted it tight. I did this twice and it held up great. I chose the side that was the strongest box to put the shelf up.


This shanty was a permanent fixture in our living room for over a month.  Yep Christmas time came and the tenants decorated their home for the holidays. :)  One day I walked in my living room and said "that is it I am ready for my living room back" and so the three little tenants moved on..


All you need is a good box and some supporting pieces of cardboard, some duct tape and you too could have some of your own sweet tenants living in your living room. :)

From my little west corner to your corner,
Becky
Related Posts Plugin for WordPress, Blogger...

LinkWithin

Related Posts Plugin for WordPress, Blogger...