Showing posts with label fabric. Show all posts

Saturday, March 23, 2013

My first Softie and bloglovin


My first softie happens to be a little bunny and he is an Easter gift for a very little friend of mine, who is celebrating his first Easter this year.  


Get the free Pattern here:  This is sunny the free bunny

I am starting to thinkI am becoming a softy for softies. (cheesy, thats me)
They are a super fun, simple and great scrap busting projects.

Here are a few more softies I am looking at on my pinterest board under sewing.

I am starting to collect  free patterns for these sweet cuties. :) Maybe I will start pumping these guys out by the dozens, by the double dozens...or maybe not.  I do know my next one will be much better.
Oh the joys of trail and error.


FYI -Google reader is leaving
...for all you who follow me or other blogs via Google reader it will be non existent this summer.  
If  you don't already have a bloglovin account it's easy to set up. Also with bloglovin you can import all your blogs you are following via google reader within a minute or 2. 
 Just go to settings and click the button to import from google reader and within a minute or 2 you have all your lovely blogs you follow right there on your bloglovin feed!  And don't worry if your favourite blogs don't use bloglovin, you can still follow them to. To add new blog just search for there name in the search bar.

If you would like to follow me via bloglovin simply click the button below:

Follow Creatively Content 
  Another way to follow Creatively Content is through facebook or e-mail. 
These option are in the side bar next to each other. 
Thanks for letting me talk through those necessary details. 

Now back to the Bunny....
using what I have to make a softie this week!
Enjoy.
In my west corner,
Becky

Tuesday, January 15, 2013

Scarp Fabric Curtain + giveaway winner

Our Scrap Fabric Curtain is complete. :) 
With bits and bobs of any and everything I could find in my sewing stash, 
I ended up with this for my girls room. 


I made this curtain pretty tight at the top. With lots of strips of fabric. I wanted this curtain to be functional, as the window that the scraps are covering looks out into other apartments. I actually think I am going to try and put 3 to 4 more strips in, just to make sure it is private.

I used:
*3 different cotton fabrics
*1 thicker polyester curtain to help with privacy and the sun
 (for all you living in Turkey - I used a white Guneslik)
*Ribbon
*1 scarf (which I might want back ;))
*1 button strand


I ripped the fabric into strips of 4 inches.


I cut the ends of my fabric pieces in different ways to give it a little texture.


I tied the fabric like a mens tie - making sure that each piece of fabric that was tied was facing the same direction.


I still have yet to put hooks in each side of the window casing and make a tie so we can pull the curtain back especially in the summer...

(The great thing about this (for those living in Turkey) we didn't have to drill into the cement for this rod we screwed into the side part of the window and it worked perfectly!) 

I am still working on the rest of the room. 
Sewing a bit, painting a bit, rummaging through old frames a bit. :) I have an old cork board that I found the perfect place for... I look forward to showing you as I complete each little part, which might take a bit. ;)

I am thinking about painting a small mural. Here is some inspiration I found from one of the blogs I follow. Talk about INSPIRATION! 

This painting is done by Chrissie @ In His Grace

 I really enjoy Chrissie's art and her blog. If you have time go by and visit! 


Using what I have to create beauty in my little girls room: today it is with scraps of fabric. 

Delighted with the life I have been given.
 Grateful for the talents I have been gifted with. 
Desirous to use my life and talents for the Glory of the King.

In my little west corner,
Becky 

 Winner of the 2013 Graphic art Calendar: Melissa 
Please contact me Melissa. I sent you an e-mail but need a confirmation! 


Linking up this post to these great blogs! Check HERE to see some great parties.

Monday, June 4, 2012

Our 'ordinary day keepsake book'

An ordinary day turned into a keepsake.
This book is about one of our days... it was just another day, now it is a keepsake and a day we will remember. :) I love it when ordinary days get highlighted. 
I love the illustrations the girls drew in this book because they are of our little western town here in Turkey and there are certain landmarks and places we visit that the girls remembered and put in the pics. :)

The idea started because we were out of drawing paper...so I went and grabbed some white fabric and cut it into squares. I gave the kids some sharpies and our "Ordinary day Keepsake book" was born.  


Come and take a look and read about our day. 


*Isaac 'designed' the cover of the book. 
*Lydia wrote and sewed on the title. 
*Lydia and Autumn told the story, mommy wrote it. (just they way they told it, so there are some grammar issues. :))
*Lydia and Autty were the fab illustrators. :) 
*Mommy sewed the book together. (2 months after the writing of it ;))

We have all sat together and read this book several times and the kids have looked at it a bunch on there own. It was a great project to do with my kids.  Maybe we will do another someday...

~Remembering and storying the ordinary days that make up our together moments. 
In our little west corner,
Becky


Monday, May 28, 2012

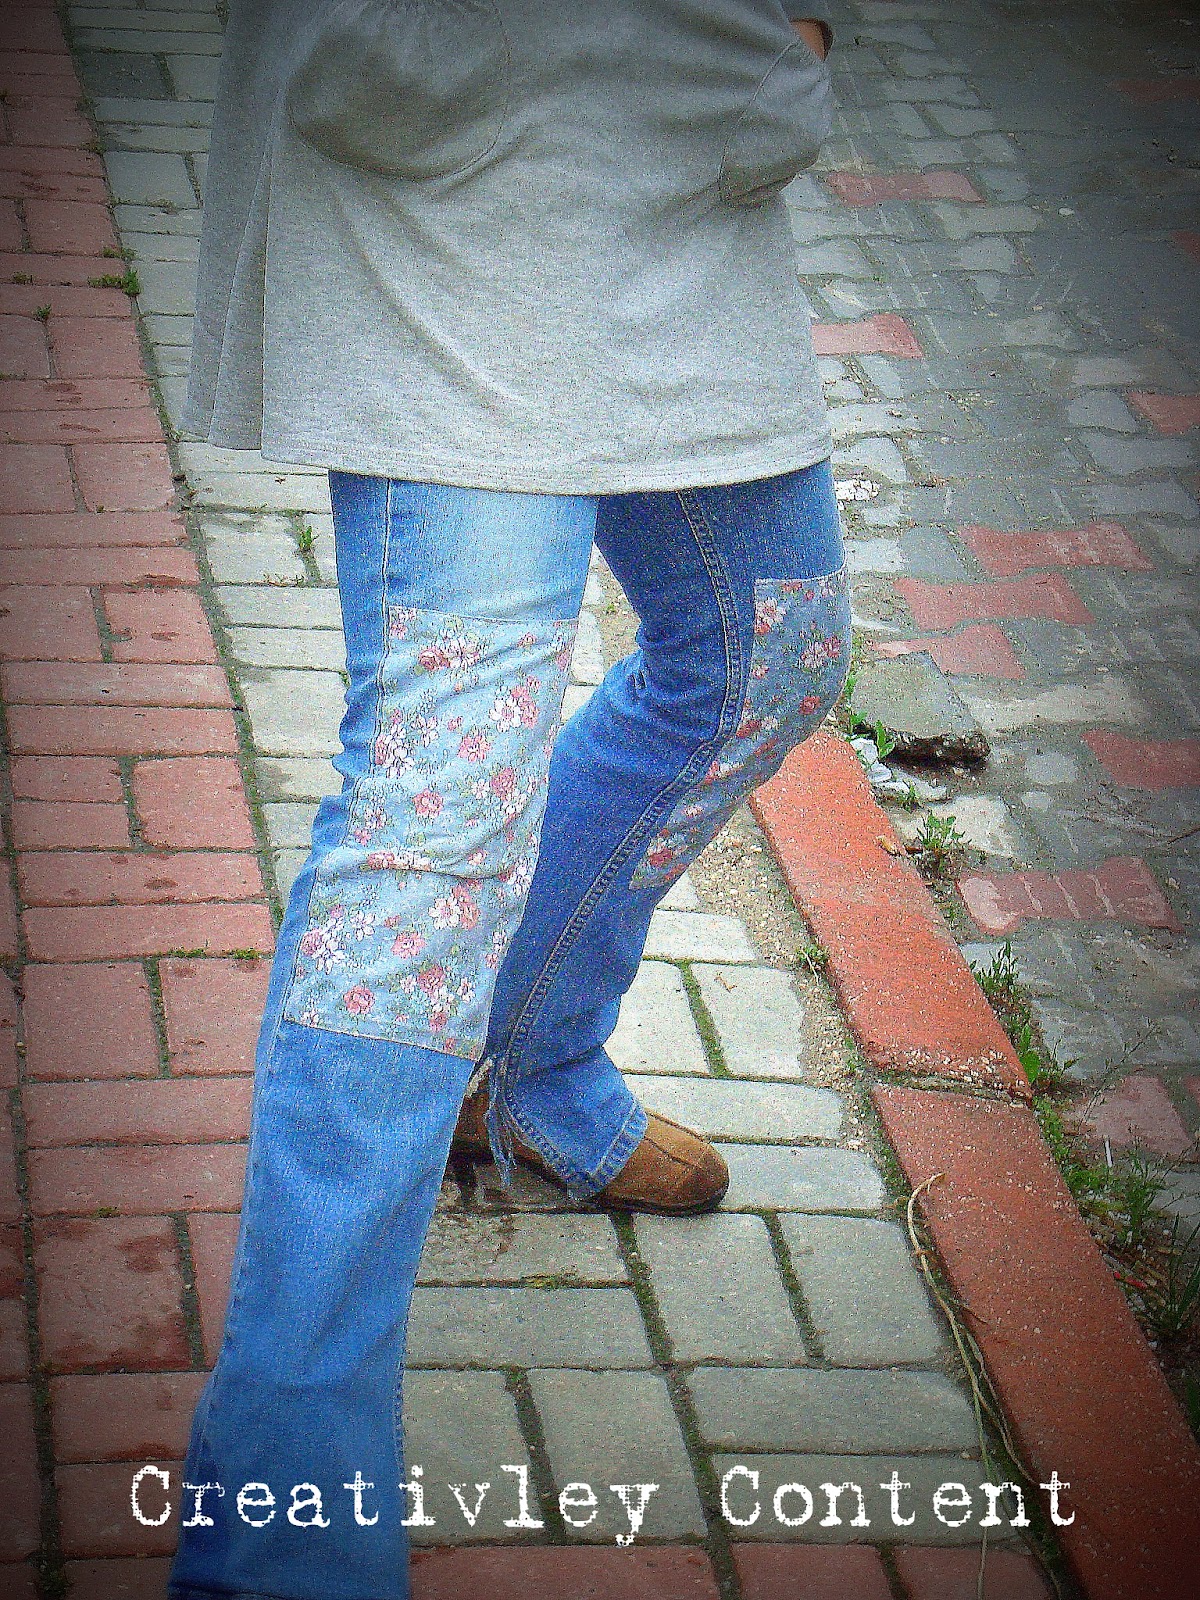
(My super duper) Up-cylced patched jeans. :)

These crazy jeans were given to me by my younger sister probably 4 years ago. I don't know what it is about these jeans but weather I add a few pounds or drop a few they always fit me. Miracle jeans truly. They are like the jeanse that keep on lasting, even if the bottoms are all tadered and torn. :)  So when one of the knees finally got a hole in them I decided to patch 'em and keep on wearing 'em.. Especially since I am at the 'add a few pounds stage' these days. :)

So here are my up-cylced patched jeans. :)


I really like the big patches. 
I hand sewed them on. It took me more time than I thought. I also before sewing on the patches ironed them on with an iron on adhesive to help keep the patches on and the hole from getting bigger.


Here I am on my balcony, trying to give ya 'all a better look at them. 

Hope this is inspiring to someone somewhere. I know there are few who would wear these pants. :) 
Deb your jeans are living on.... you would be proud. :)

In my west corner..using what I have to keep my jeans alive.
Becky
Psst...i just discovered the beginning of a hole right next to one of my back pockets. ??? 


Wednesday, February 22, 2012

Homemade Lavender fabric pouches (& a bit of culture)

This little project is perfect for small sweet gifts to fit into any type of card.
This is also great for those pieces of scrap fabric and ribbon.
Each little pouch has a different front and back.


The little story of how my lavender fabric pouches came to be:
Circumcision is quite an event here. It is kind of like a coming of age party for the boys. Usually they have the party for the boys around age 7or 8. We are being invited to several these days because so many of Autty's little class mates are of that age. No, my daughter has no real understanding of these parties, she just thinks it is unfair that the boys get these parties and the girls don't. :) So as we have attended a few circumcision parties as of late, I have found that lavender is a popular thing to give to the guests. Who knew? Usually the lavender is in some sort of vellum pouch, so it got me to thinking. I decided to go find myself some lavender, figuring it couldn't be that expensive. 
I have been able to make 8 fabric pouches with this bag of lavender and I think I can easily get 2 more out of it.  So that is 1 lira (.65cents) for 10 sweetly scented pouches. Oh the things you can learn at circumcision parties. Love it!


Here is a pic of us at one of Autty's friends circumcision party. 

Two little kids and a bunch of tiny little flowers, equals a need for concentration. 

Sweetly placed in a drawer to make you smile. 

Off I go sewing up a little storm of lavender pillows, sachets, pouches etc.

Smelling sweetly here in our west corner,
Becky

Ps. Please keep your eyes open for the giveaway planned this month. Also I have finally got a Facebook page up a running..feel free to find me there. :)

Monday, January 23, 2012

R*E*A*D

We like books here. 
This little fabric R*E*A*D sign I applied several months ago and I like him :) 
I used the water/cornstarch mixture that I have referenced before. 
The recipe is here if you are interested in applying some fabric letters to your walls. ;)

Simple DIY: I used the STENCIL font in my word and made the font as big as I wanted and than cut out and traced the template letters unto the fabric, cut out the fabric letters and then applied to wall with the cornstarch mixture. It took very little time and effort.

We especially like the series 'The Little's' as of late. 
Little people and tiny tales with fun adventures.
I so miss Libriaries.

Turkish or English anyone? 
I did this several months ago too when my oldest daughter was learning to read Turkish and we needed to keep some of the beginner books separate.
Nothing like painting a box and labeling it with scrapbook paper. :) 

Thanks for peeking into a bit of our life here in our 
little west corner,
Becky

Come check out where I party.

Monday, January 16, 2012

Scrap fabric pillow with a pop

Here is what I have been working on....


I was determined to only use my scrap pieces of fabric for this pillow, minus the back. 
The result was a pop of color and vibrancy.


I tried a few new things with some of the left over pieces. 
I don't know all the rules to piecing and applique, however this time I really wanted to use that to my advantage instead of feeling inferior or uncertain. Sometimes not having all the details allows for more experimentation.  I see how I can do a few things different next time. But overall I am pleased with it.  


Would love your input..what do you think?

Dear following along friends, I have decided when I hit the 299 mark for followers and readers that I would like to do another giveaway. I think I am about 10 away..so keep an eye out.  I have a real surprise this time. I am so honestly humbled that you all have joined up to make this journey here in the West Corner so much more full for me. Thank you.

In my west corner,
Becky

linking up at these great Parties  click here 

Tuesday, December 20, 2011

A Button Tree ~ and yo yo bows

Buttons ~ easy to find here and fairly inexpensive. 
A button tree ornament makes for a simple handmade gift~


My little gifts wrapped and tied up with ribbon and adorned with sweet  fabric yo yos. 

Keeping it simple here in my west corner and using what I have to create and decorate this Holiday.

Emmanuel God with us 
~ In my west corner, God with us!
Becky

Wednesday, November 23, 2011

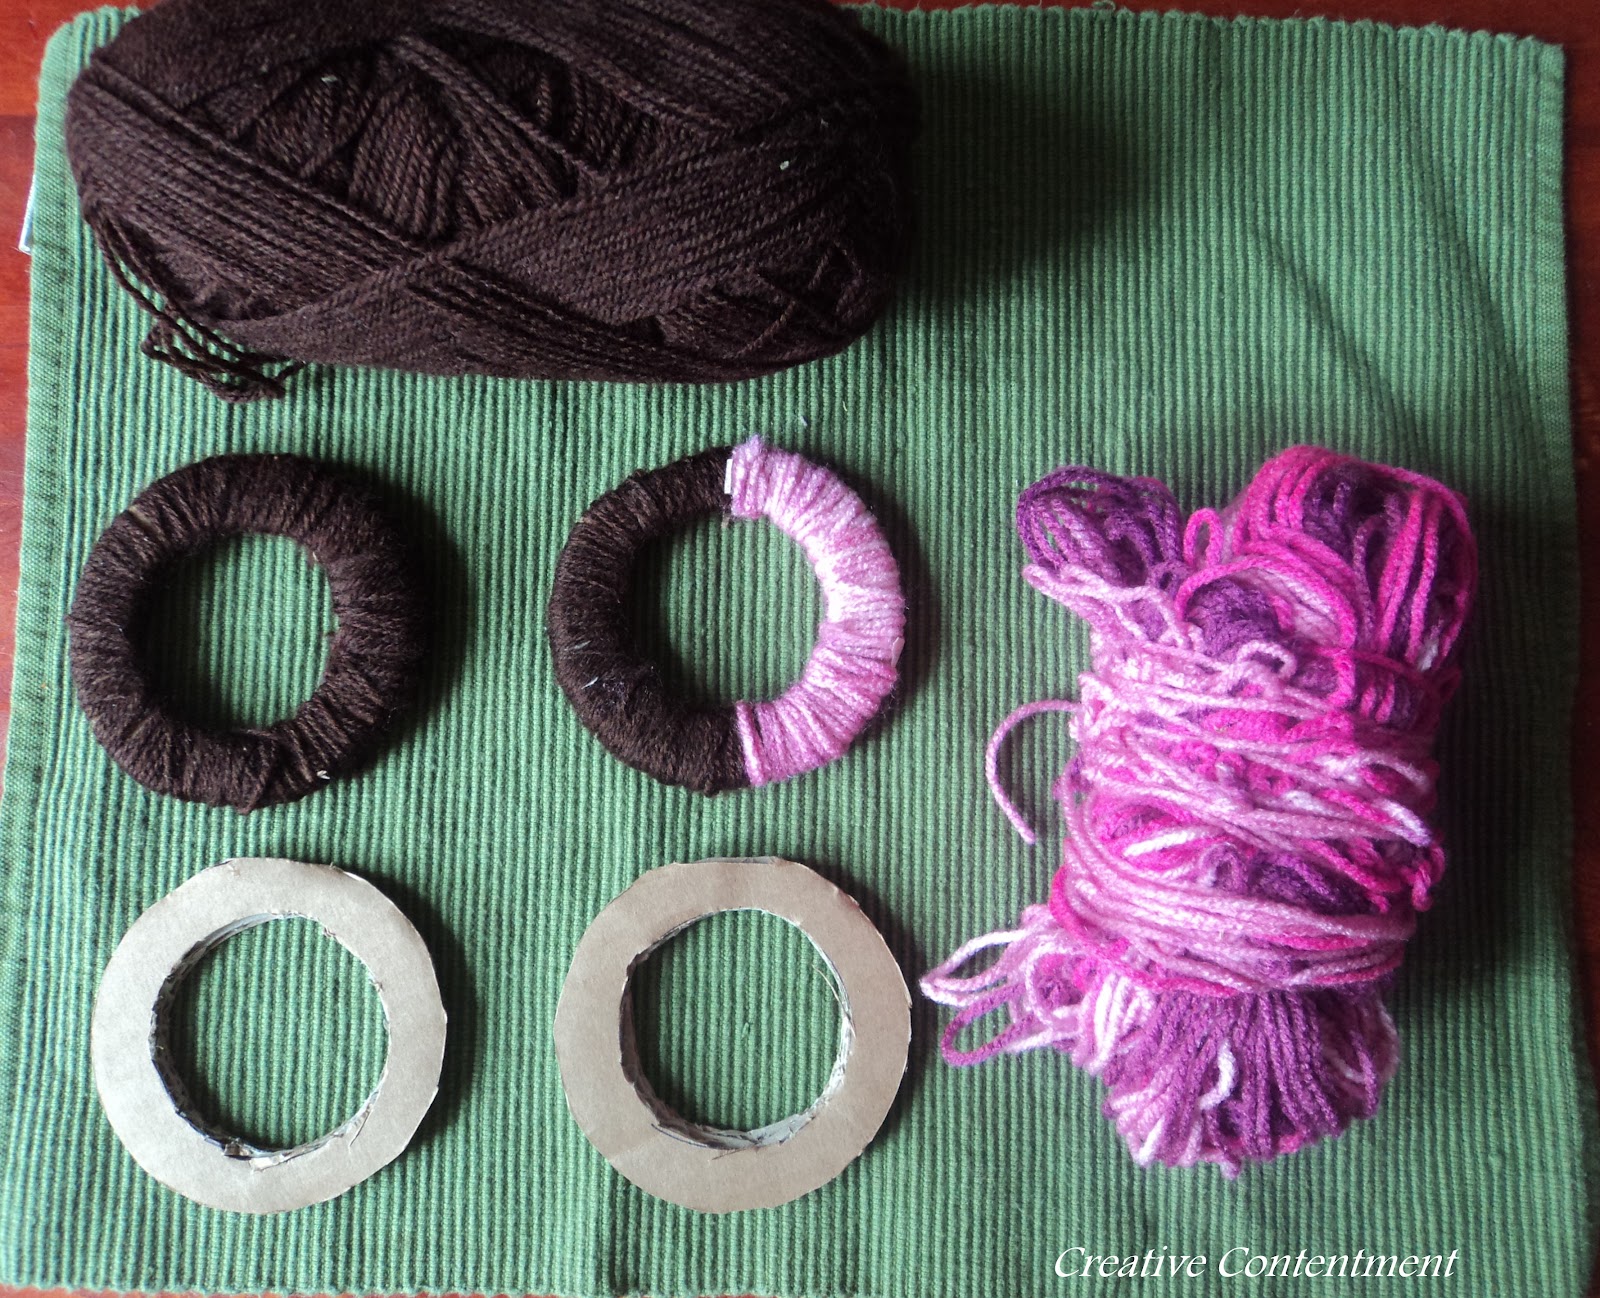
Cardboard love Part #2- mini CARDBOARD WREATHS by my kiddos

Our mini cardboard wreaths made from yarn, fabric and felt come and see...

Mini yarn and felt flowers wreaths
my girls did these all by themselves they took a bit of diligence but the end result was worth it!!


Here is a great tutorial for making felt flowers that my kids did with ease. 
Click on the link


What we did and used:
 *(thick) Cardboard for the mini wreath cut and prepared
*yarn  (I cut peices that were not to long so the girls could easily bring them back and forth)
*Felt and scissors to make the flowers
*Glue gun to glue on the flowers
*Ribbon for them to hang

These are their little wreath ornaments that they want to hand on the tree. :)


Oh and I decided to try my hand at it too...I used some of my fabric scraps and this is what I came up with.  
A sweet little scrap fabric wreath. I actually would like to make another one and pick some fun fall colors, wouldn't that be fun. Maybe next year. :) 

I just tied the scrap fabric around the cardboard 
pushed them tightly together 
and then trimmed the fabric when I was all done. 
 Looks more like spring then fall. :)

Fall is leaving us, as we begin to leave the chillness of autumn and enter the cold of winter.  I found a string of colored leaves the other day that made me so very happy. I love how Thanksgiving helps us to enter into the fun Holiday season of Christmas and helps me say goodbye to a fleeting Aututmn. :)


Happy Thanksgiving to all of you, especially our dear family back in the States. We miss you and love you.

Wanting to practice a heart of gratitude and joy no matter the season or day...
In our west corner celebrating the Gods provision, care and closeness.  
Becky
ps. i am excited to open our Thanksgiving mailbox tomorrow..:) 


I HAVE LEARNED THE SECRET OF BEING CONTENT IN ANY AND EVERY SITUATION, WHETHER WELL FED OR HUNGRY, WHETHER LIVING IN PLENTY OR IN WANT. I CAN DO EVERYTHING THROUGH HIM WHO GIVES ME STRENGTH." PHIL. 4:12,13
Related Posts Plugin for WordPress, Blogger...

LinkWithin

Related Posts Plugin for WordPress, Blogger...